EXXACT server usage (Neural Networks)
In all instances, please note that docker will be used for training
A VPN connection is required to access this machine.
Booking of this resource for extended periods is required at: SEPT NN Training (EXXact)
Code Editors
It is highly suggested that a code editor that integrates into remote systems is used for development alongside git.
Common IDE with remote SSH suggestions would include:
Common git hosts would include:
Creating and running a container for your code
- Log into Exxact server as nnuser using a ssh client, i.e. Putty, Powershell, etc. with nnuser@130.113.129.242 and password Exxact1.
- Create a folder with YOUR MacID using the command mkdir [MacID]
- Change directory into your directory using cd ./[MacID]. Do not use or override another users directory.
- Copy your data and python script and data into your directory using an SFTP client, i.e. FileZilla, WinSCP etc.
- Choose the trainer of choice
- Custom – A docker image you created yourself
- Tensorflow (https://hub.docker.com/r/tensorflow/tensorflow)
- PyTorch (https://hub.docker.com/r/pytorch/pytorch)
- For TensorFlow: Create a docker image with the following command and let it run: This will:
$ docker run -d --rm --name [MacID] --gpus all -u $(id -u):$(id -g) -v /home/nnuser/[MacID]/:/data tensorflow/tensorflow:latest-gpu python /data/main.py
- Create an image with your MacID as the name (--name [MacID])
- Remove the image once its done (--rm should be removed while testing and getting your files setup)
- Allow you access to the files that you saved (--user $UID)
- Run your script with your custom code until it exits (python 3 /data/main.py) *Note: You should replace main.py with your main executable function if it was not named main.py
- Use GPU acceleration and the latest TensorFlow version
- For PyTorch: Create a docker image with the following command and let it run: This will:
$ docker run -d --rm --name [MacID] --gpus all -u $(id -u):$(id -g) -v /home/nnuser/[MacID]/:/data pytorch/pytorch:latest python /data/main.py
- Create an image with your MacID as the name (--name [MacID])
- Remove the image once its done (--rm should be removed while testing and getting your files setup)
- Allow you access to the files that you saved (--user $UID)
- Run your script with your custom code until it exits (python 3 /data/main.py) *Note: You should replace main.py with your main executable function if it was not named main.py
- Use GPU acceleration and the latest PyTorch version
NOTE: It is highly recommended that you write your python code output to console as this will get both logged and allow you to see what your script is doing while running during training.
Managing your container
When running:
- View your container at 130.113.129.242:9000 with username nnuser and password Exxact1
- Click Containers:

- Find your container:

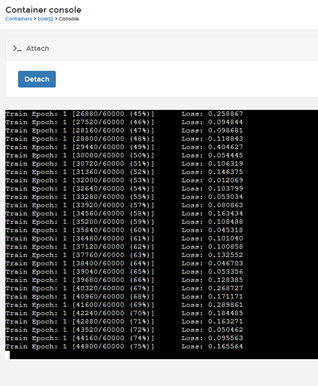
- Attach to see output:

- View Output

When testing (container does not include --rm statement):
- View your container at https://130.113.129.242:9443 with username nnuser and password Exxact1
- Click Containers:

- Find your container:

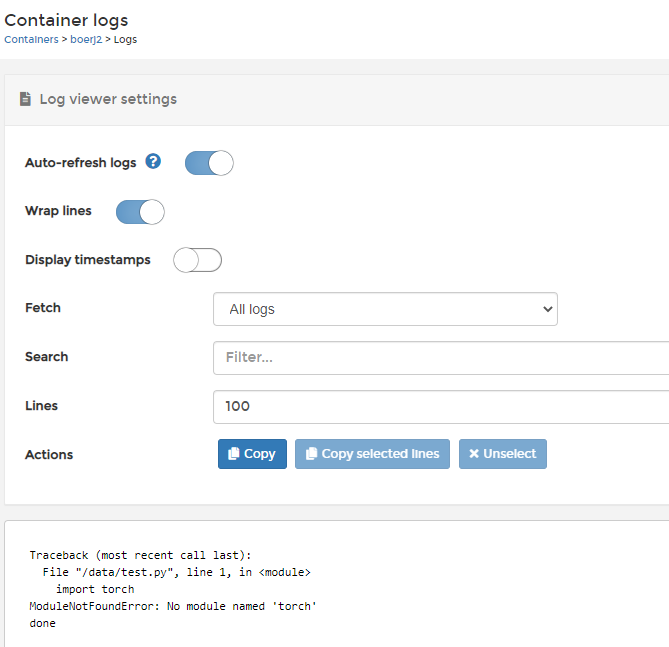
- Logs to see output:

- View Output: This will show errors etc.

IMPORTANT NOTES
- Save your OUTPUT of your model to your /data NOTHING will get saved that is placed ANYWHERE else
- Remove your files once done. There is limited space on the server.
- Respect other users training. This is a shared resource. Do not stop or remove their containers without permission
Scripts for Import - Custom requirements
If your script requires any imports that is non-standard to a package, you will need to adjust your execution string accordingly.
NOTE: This script requires that you finish with your training to get access to any produced files.
You will need to create the following:
- a requirements.txt file within your python environment
#Google Colab
!pip freeze > requirements.txt
#Local Python env.
pip freeze > requirements.txt
- a shell script that installs the imports and runs the script. This can be copied.
#entrypoint.sh (Python 3)

#!/bin/bash
python3 -m pip install requests
python3 -m pip install PIL
pip install --upgrade pip
pip install /data/requirements.txt
python3 /data/main.py
chown $USERID:$USERID -R /data
#entrypoint.sh (Python 2)

#!/bin/bash
python -m pip install requests
python -m pip install PIL
pip install --upgrade pip
pip install /data/requirements.txt
python /data/main.py
chown $USERID:$USERID -R /data
When the shell script is used, adjust your string as follows:
#Docker Tensorflow
$ docker run -d --rm --name [MacID] -u $(id -u):$(id -g) --gpus all  -e USERID:$UID -v /home/nnuser/[MacID]/:/data tensorflow/tensorflow:latest-gpu /bin/bash /data/entrypoint.sh
#Docker Pytorch
$ docker run -d --rm --name [MacID] -u $(id -u):$(id -g) --gpus all -e USERID:$UID -v /home/nnuser/[MacID]/:/data pytorch/pytorch:latest /bin/bash /data/entrypoint.sh