AV Instructions: ETB B104
Updated instructions on the backup old projector:
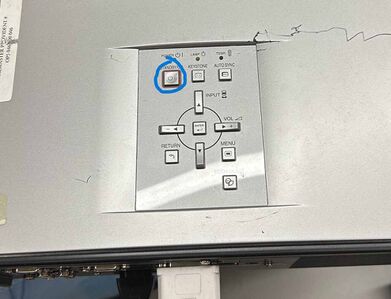
-Manually turned on and off at the projector is needed as there is no remote. Please see the diagram below that illustrates the buttons on the projector.
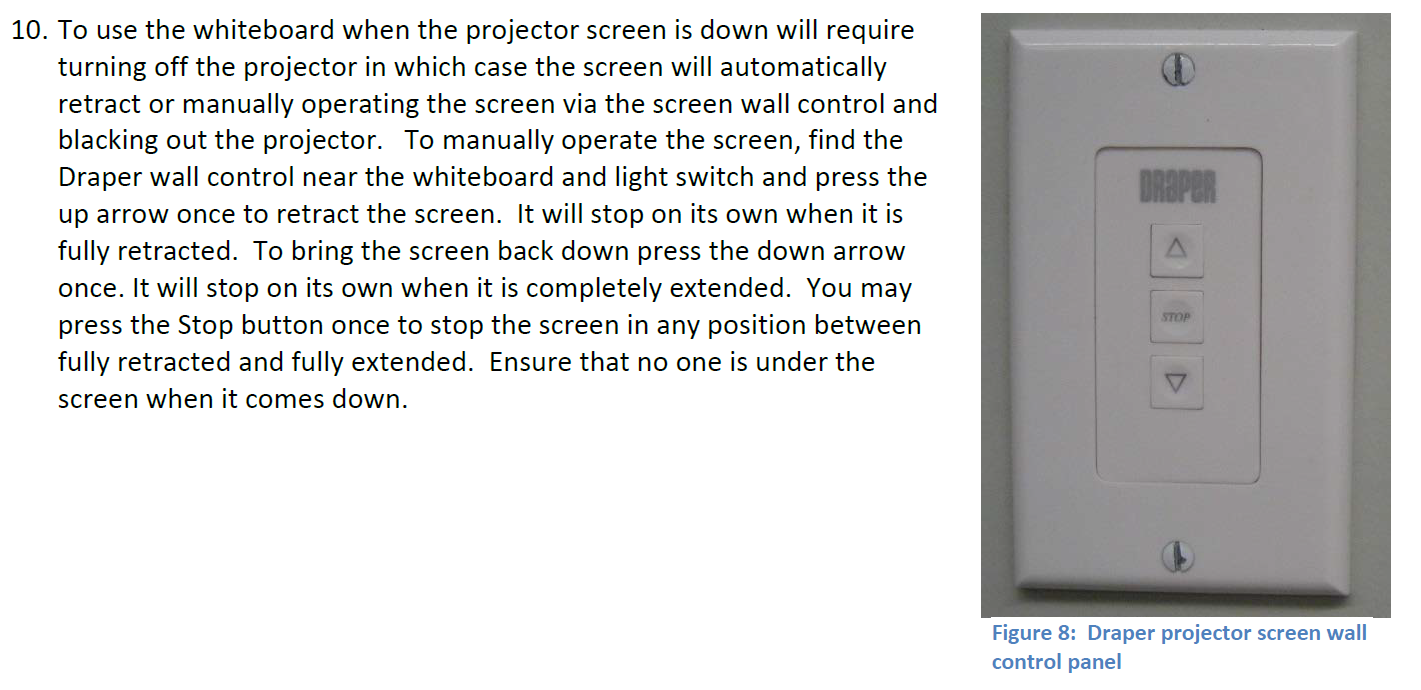
You will not need to turn on the main ceiling projector. Instead you can manually bring down the screen using the manual controls on the wall. The backup projector is connected to the instructor monitors DVI video feed and will not be affected by the main projector being off. Please see the diagram and instruction below for details.
General guidelines:
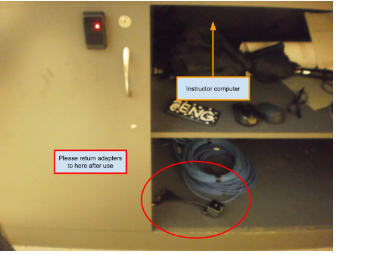
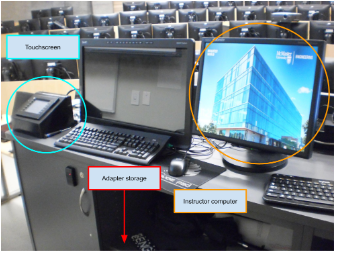
1. Please return the provided adapters to the shelf underneath the instructor computer after use
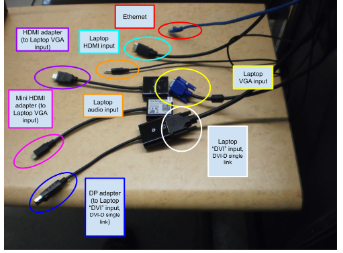
2. Please bring your own adapter if your device does not have any of the following output ports: VGA, HDMI, DVI-D single link, DP, mini HDMI
3. If your device's output ports are not on its right side (i.e. are on its front, left, or back) then you may need to bring your own extension cable
4. Left-click and right-click refer to the default right-handed mouse configuration - reverse them if applicable
5. This room is able to simultaneously play audio from the provided computer as well as a your own device
6. This room has an ethernet cable for your device
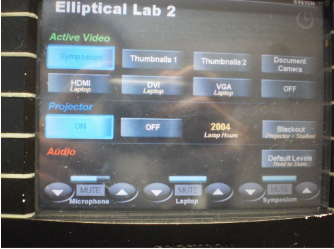
7. The desk-embedded touchscreen is not very sensitive, so you may need to firmly and/or repeatedly press for the desired outcome
8. The Symposium option copies the second monitor from the left of the instructor desk
===
Using provided computer, if you do not see any image on the screen:
1. Ensure the projector is on
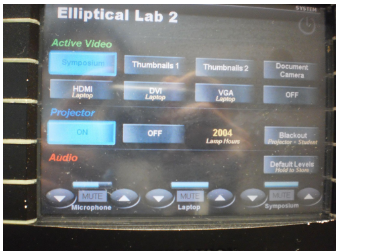
a. Use the touchscreen to turn on the projector
b. Also ensure the backup projector is on by press the STANDBY/ON button
2. Use the touchscreen to change the input that the projector is copying to Symposium
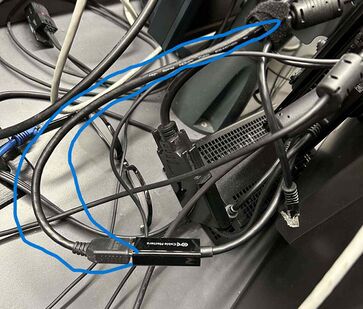
3. Ensure the HDMI output is connected to the dongle on the left side of the computer
a. The right HDMI cord is the one that connects to the strap behind the monitor
===
Using the provided computer, if you do not hear any sound:
3. Ensure the computer's sound is on and turned up, and selected properly
a. Left-click the speaker icon in your taskbar, press/hold the right-arrow key on the keyboard until loud enough
b. If there is no sound and/or a red circle with an X, right-click the speaker icon, left-click Sounds, left click Playback, right click right click an option on the list, and left-click Enable; repeat this + 3a if necessary
c. On the same menu as 3b, left-click Set as Default Device, test by repeating 3a, and repeat this if necessary
4. Ensure the projector’s sound is on and turned up
a. Use the touchscreen to increase the volume for Symposium (up arrows)
b. Repeat 3a, 3b, and 3c as necessary
===
Using your own device, if you do not see any image on the screen:
5. Ensure the proper cable and/or adapter is properly plugged in
a. Unplug and replug the cable and/or adapter
b. Tighten the retention screws if available
6. Ensure the projector is selecting the correct input
a. Use the touchscreen to change the input that the projector is copying to the one applicable (HDMI Laptop, DVI Laptop, or VGA Laptop)
===
Using your own device, if you do not hear any sound:
7. Ensure the audio cable is plugged in properly
a. Refer to 5a
8. Ensure your computer's sound is on and turned up
a. Refer to 3a, 3b, and 3c
9. Ensure the projector’s sound is on and turned up
a. Use the touchscreen to increase the volume for Laptop (up arrows)
10. Bring your own speakers, and ensure they are working properly
a. Ensure your speakers are properly powered and connected to your computer (this varies according to your speakers)
b. Repeat 3a, 3b, and 3c as necessary

