AV Instructions: ETB 234: Difference between revisions
No edit summary |
No edit summary Tags: Manual revert Visual edit |
||
| Line 1: | Line 1: | ||
General | General guidelines: | ||
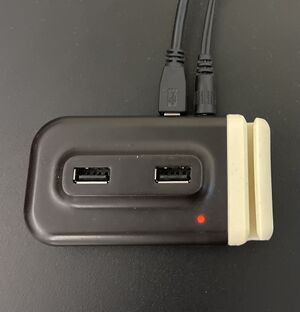
Important - On the instructor podium, the USB 2.0 needs to be used on the black and beige adaptor while USB3 will be used on the black box adapter. | Important - On the instructor podium, the USB 2.0 needs to be used on the black and beige adaptor while USB3 will be used on the black box adapter. | ||
Revision as of 12:51, 25 October 2024
General guidelines:
Important - On the instructor podium, the USB 2.0 needs to be used on the black and beige adaptor while USB3 will be used on the black box adapter.
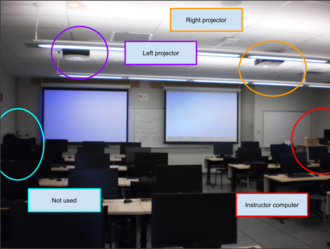
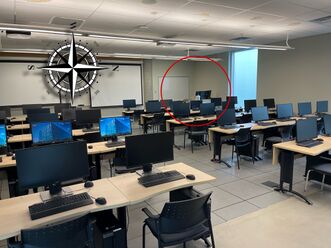
1. The instructor area is the front right of the classroom (opposite corner to the doors) - the cabinet and table in the adjacent corner are not used
2. This room currently has limited sound capabilities - you may need to bring your own speaker
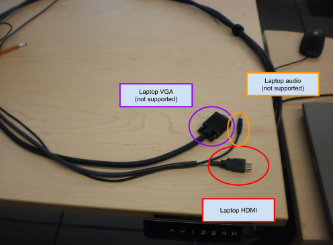
3. Please return the provided HDMI and audio cables neatly to the desk (do NOT let it drop to the floor)
4. The remote works for both of the projectors - you need to point the remote directly at the projector of interest (you may need to walk to the centre of the room)
5. Please bring your own adapter if your device does not have an HDMI output port
6. Left-click and right-click refer to the default right-handed mouse configuration - reverse them if applicable
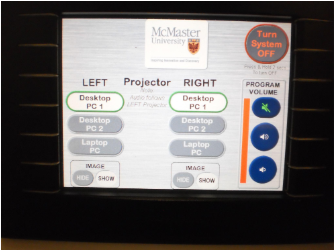
7. The wall-embedded touchscreen is not very sensitive, so you may need to firmly and/or repeatedly press for the desired outcome
===
Using provided computer, if you do not see any image on the screen:
1. Ensure you are logged in
2. Ensure the projector is on
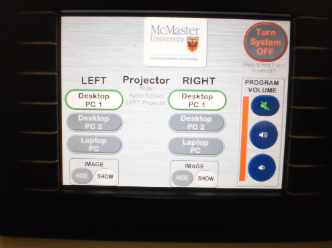
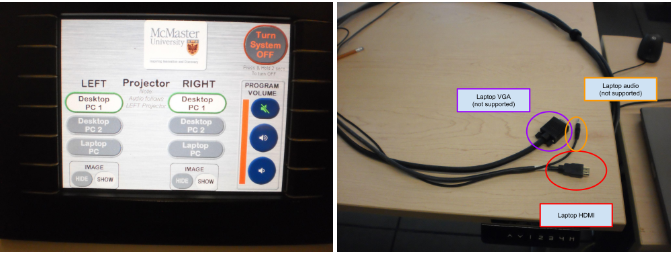
a. Use the touchscreen to turn on the projector
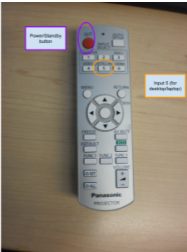
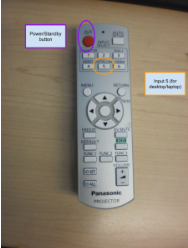
b. Use the remote to manually turn on/off the projector (The remote works for both of the projectors, so you need to point the remote directly at the projector of interest - you may need to walk to the centre of the room)
3. Ensure that the projector is selecting the correct input
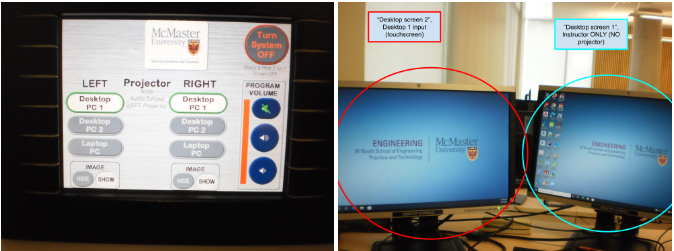
a. Use the touchscreen to change the monitor that the projector is copying - choose Desktop PC 1
b. Use the remote to select input 5 (DIGITAL LINK)
4. Ensure the computer is outputting its image properly
a. Press the Windows key and P at the same time
b. Select Second screen only
c. Repeat 3a, and 3b as necessary
===
Using the provided computer, if you do not hear any sound:
5. Ensure the computer's sound is on and turned up, and selected properly
a. Left-click the speaker icon in your taskbar, press/hold the right-arrow key on the keyboard until loud enough
b. If there is no sound and/or a red circle with an X, right-click the speaker icon, left-click Sounds, left click Playback, right click the Speakers option (Realtek High Definition Audio - NOT USB Codec or NVIDIA High Definition Audio), and left-click Enable
c. On the same menu as 5b, left-click Set as Default Device, test by repeating 5a
===
Using your own computer, if you do not see any image on the screen:
6. Ensure your device is properly plugged in
a. Ensure the cable and adapter (if applicable) is(/are) properly plugged in - remove and replug (ensure correct orientation)
7. Ensure the projector is selecting the correct input
a. Refer to 3a (choose Laptop, instead of Desktop PC 1 or Desktop PC 2)
b. Refer to 3b as necessary
===
Using your own computer, if you do not hear any sound:
7. Ensure your computer's sound is on and turned up
a. Refer to 5a, 5b (change the audio output option as necessary), and 5c
8. Bring your own speakers, and ensure they are working properly
a. Ensure your speakers are properly powered and connected to your computer (this varies according to your speakers)
b. Repeat 5a, 5b, and 5c as necessary
