Connecting to VMware Horizon for SEPT Labs/Software: Difference between revisions
From SEPT Knowledge Base
Admin boerj2 (talk | contribs) |
(Comment out sections on collaboration and remote applications which are not currently supported) |
||
| (3 intermediate revisions by 2 users not shown) | |||
| Line 1: | Line 1: | ||
<blockquote>'''Note''' that this setup requires your machine to be restarted. Please '''SAVE and CLOSE''' all programs before starting the setup. To connect to these servers, a '''[https://uts.mcmaster.ca/services/computers-printers-and-software/virtual-private-networking/ VPN]''' connection is required at | <blockquote>'''Note''' that this setup requires your machine to be restarted. Please '''SAVE and CLOSE''' all programs before starting the setup. To connect to these servers off-campus, a '''[https://uts.mcmaster.ca/services/computers-printers-and-software/virtual-private-networking/ VPN]''' connection is required. <br/><br/>For '''ALL''' issues please contact btechts@mcmaster.ca or create a ticket at [https://servicedesk.sept.mcmaster.ca SEPT Service Desk]</blockquote> | ||
=== Download and setup VMware === | === Download and setup VMware === | ||
| Line 15: | Line 15: | ||
## If your lab is the '''GRAD''' open labs, you will find it in the '''''ETB LABS''''' connection. This includes the VDI. | ## If your lab is the '''GRAD''' open labs, you will find it in the '''''ETB LABS''''' connection. This includes the VDI. | ||
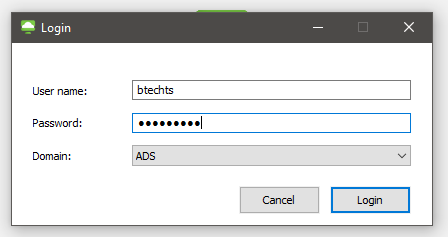
# Enter your MacID and password<br>[[File:VMWare Horizon Client pic10.png]] | # Enter your MacID and password<br>[[File:VMWare Horizon Client pic10.png]] | ||
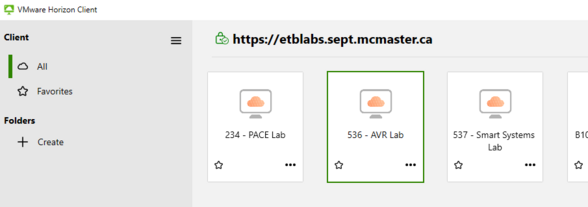
# Select the appropriate LAB or desktop application<br>[[File: | # Select the appropriate LAB or desktop application by clicking on it. When selected a green box will appear around the tile. <br>[[File:VMware Horizon Highlighted Tile.png|588x588px]] | ||
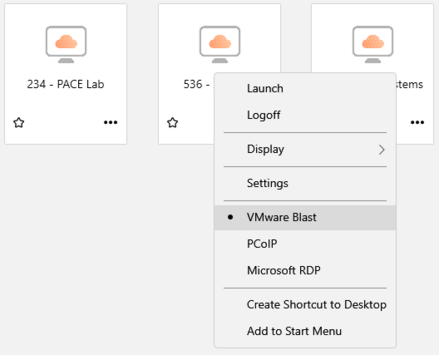
# Right click the tile, or click the 3 dots in bottom-right corner to pull up an options menu and double check that "VMware Blast" is selected (has a black dot next to the text). If it is not selected, click on the text to select it. <br>[[File:VMware Blast selected.png|439x439px]] | |||
# Launch a machine by either pressing enter, double-clicking the tile, or selecting "Launch" from the options menu. | |||
# Wait for the connection to load<br>[[File:VMWare Horizon Client pic12.png]] | # Wait for the connection to load<br>[[File:VMWare Horizon Client pic12.png]] | ||
# Connect required USB devices for Lab Experiments<br>[[File: | # The client may prompt about sharing removable storage and local files | ||
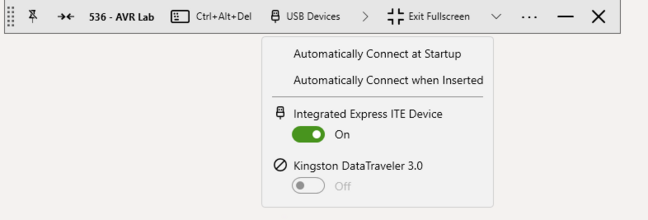
# Connect required USB devices for Lab Experiments using the toolbar<br>[[File:Selecting a USB device.png|648x648px]] | |||
<!-- | |||
=== Accessing Remote Applications: === | === Accessing Remote Applications: === | ||
In some cases, it is better to access individual applications remotely instead of the entire computer. To obtain direct access to these applications they must be assigned to you before accessing them. Upon login, to the respective server (ETB or MARC) you will see any available applications on the dashboard.<br>[[File:VMWare Horizon Client pic14.png]] | In some cases, it is better to access individual applications remotely instead of the entire computer. To obtain direct access to these applications they must be assigned to you before accessing them. Upon login, to the respective server (ETB or MARC) you will see any available applications on the dashboard.<br>[[File:VMWare Horizon Client pic14.png]] | ||
| Line 36: | Line 39: | ||
# To join a user's VDI session, open the VMware Horizon Client and login to the appropriate building where the host has started a session (ETB or MARC). If you have not yet added the server, see [https://servicedesk.sept.mcmaster.ca/kb/pages/viewpage.action?pageId=1572887#ConnectingtoVMwareHorizonforSEPTLabs/Software-SetupServerAddress Setup Server Address].<br>[[File:VMWare Horizon Client pic22.png]] | # To join a user's VDI session, open the VMware Horizon Client and login to the appropriate building where the host has started a session (ETB or MARC). If you have not yet added the server, see [https://servicedesk.sept.mcmaster.ca/kb/pages/viewpage.action?pageId=1572887#ConnectingtoVMwareHorizonforSEPTLabs/Software-SetupServerAddress Setup Server Address].<br>[[File:VMWare Horizon Client pic22.png]] | ||
# Once you are logged in to the building, any sessions you have been invited to should appear in the list of available labs. Double click on the collaboration session to join.<br>[[File:VMWare Horizon Client pic23.png]] | # Once you are logged in to the building, any sessions you have been invited to should appear in the list of available labs. Double click on the collaboration session to join.<br>[[File:VMWare Horizon Client pic23.png]] | ||
--> | |||
=== Common Issues: === | === Common Issues: === | ||
Latest revision as of 11:40, 12 January 2026
Note that this setup requires your machine to be restarted. Please SAVE and CLOSE all programs before starting the setup. To connect to these servers off-campus, a VPN connection is required.
For ALL issues please contact btechts@mcmaster.ca or create a ticket at SEPT Service Desk
Download and setup VMware
- Download the VMWare Horizon Client (At least V8 2309, suggested latest V8):
All Devices - Horizon Clients
Windows Client
OSx Horizon Client - Install the VMWare Horizon Client from your downloads

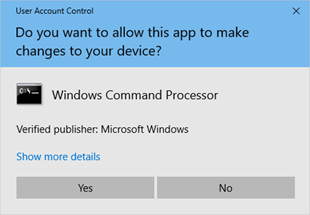
- Accept Windows UAC by clicking on “Yes”
- Accept licence terms and install the client by clicking on “Agree & Install”

- Click on “Finish” once the application is done installing
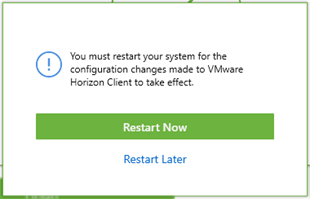
- Restart Machine by clicking on “Restart Now”
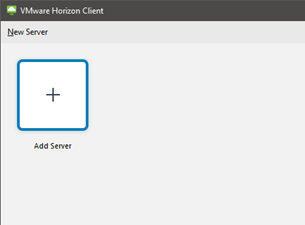
- Open VMware Horizon Client and click on either “New Server” or “Add Server”
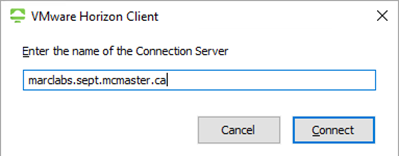
- Enter the address of the building you wish to connect to
- If your lab is in ETB, enter “etblabs.sept.mcmaster.ca” and click “Connect”

- If your lab is in MARC, enter “marclabs.sept.mcmaster.ca” and click “Connect”
- If your lab is the GRAD open labs, you will find it in the ETB LABS connection. This includes the VDI.
- If your lab is in ETB, enter “etblabs.sept.mcmaster.ca” and click “Connect”
- Enter your MacID and password
- Select the appropriate LAB or desktop application by clicking on it. When selected a green box will appear around the tile.
- Right click the tile, or click the 3 dots in bottom-right corner to pull up an options menu and double check that "VMware Blast" is selected (has a black dot next to the text). If it is not selected, click on the text to select it.
- Launch a machine by either pressing enter, double-clicking the tile, or selecting "Launch" from the options menu.
- Wait for the connection to load

- The client may prompt about sharing removable storage and local files
- Connect required USB devices for Lab Experiments using the toolbar


Common Issues:

Check that you are connected to the VPN when you add or try and connect to the server. (McMaster Student VPN)
When the VMware Horizon Client is first installed, it will default to selecting all “All Monitors”
When connecting to a VDI session you only have 1 monitor. This will cause the client to take over all monitors you have available in full screen. To use the Horizon Client on only a single monitor, right-click on the lab you wish to join and under “Display” select either “Fullscreen” or “Window – Large”
The Connection Server Authentication Failed due to a certificate error

