Printing - ETB/MARC: Difference between revisions
From SEPT Knowledge Base
mNo edit summary |
mNo edit summary |
||
| (3 intermediate revisions by 2 users not shown) | |||
| Line 1: | Line 1: | ||
# Download the '''Smart Start printer Driver''' for your system from: [https://www.support.xerox.com/en-us/product/altalink-c8000-series/downloads Xerox Smart Start - Driver Installer] | |||
## | ==== Download Drivers ==== | ||
# Download the '''Smart Start printer Driver''' for your system from either: | |||
# Accept the UAC if required<br/>[[File:Printing - ETB-MARC pic1.png]] | ## Windows | ||
# Agree to the Terms of Service<br/>[[File:Printing - ETB-MARC pic2.png]] | ### [https://www.support.xerox.com/en-us/product/altalink-c8000-series/downloads Xerox Smart Start - Driver Installer] | ||
# Select the correct printer from the discovered printers by clicking quick install:<br/>[[File:Printing - ETB-MARC pic3.png]] | ### [https://www.microsoft.com/en-ca/p/xerox-print-and-scan-experience/9wzdncrfj1f8 Microsoft APP Store] | ||
## If you don't see desired printer listed, you might need to connect to the [https://uts.mcmaster.ca/services/computers-printers-and-software/virtual-private- | ## OSX | ||
### [https://www.support.xerox.com/en-us/product/altalink-c8000-series/downloads Xerox Smart Start - Driver Installer]<br/>''NOTE'': use '''Mac OS Common Print Driver Installer''' | |||
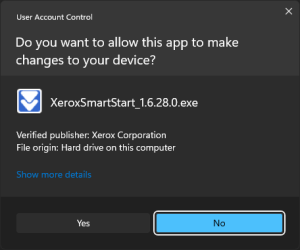
# Accept the UAC if required<br />[[File:Printing - ETB-MARC pic1.png]] | |||
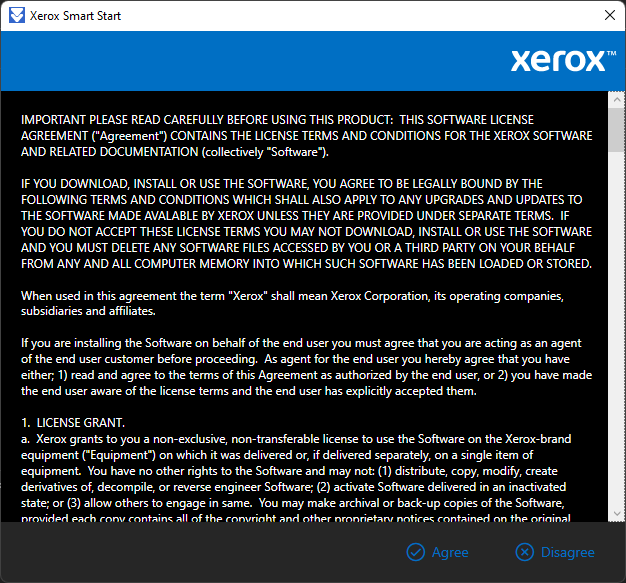
# Agree to the Terms of Service<br />[[File:Printing - ETB-MARC pic2.png]] | |||
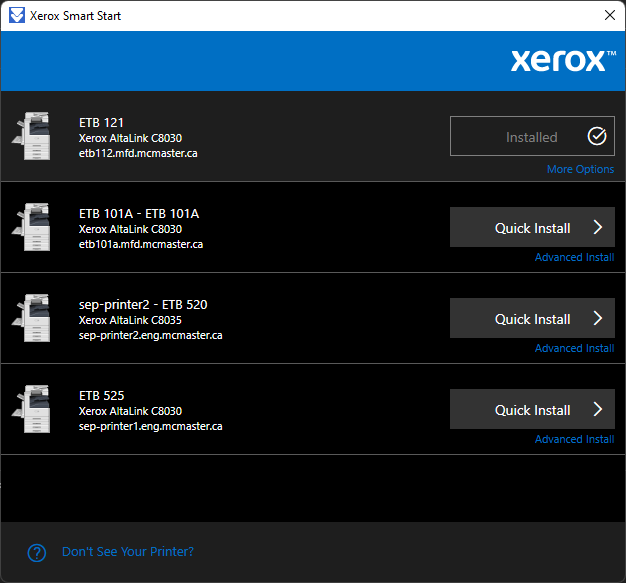
# Select the correct printer from the discovered printers by clicking quick install:<br />[[File:Printing - ETB-MARC pic3.png]] | |||
## If you don't see desired printer listed, you might need to connect to the [https://uts.mcmaster.ca/services/computers-printers-and-software/virtual-private-networking/ VPN] if you're on the WiFi | |||
## Select "Don't your printer?" | ## Select "Don't your printer?" | ||
## Enter the printer IP in the textbox as: | ## Enter the printer IP in the textbox as: | ||
| Line 11: | Line 16: | ||
### '''130.113.102.11 - 2nd Floor''' | ### '''130.113.102.11 - 2nd Floor''' | ||
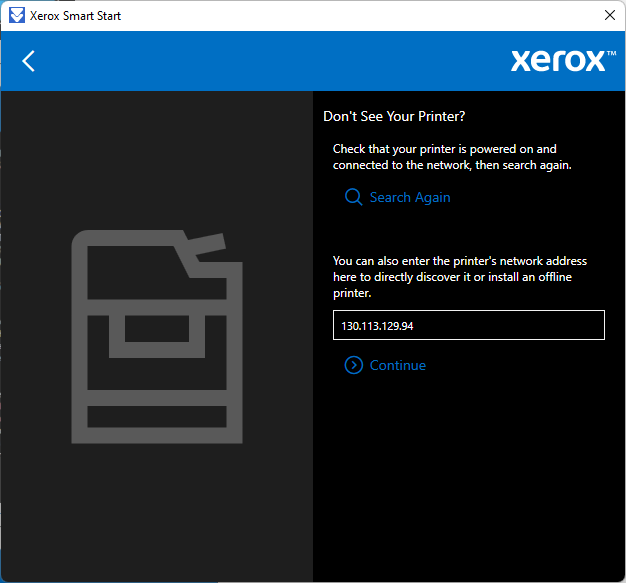
### '''130.113.129.94 - 5th Floor''' | ### '''130.113.129.94 - 5th Floor''' | ||
### '''130.113.158.49 - MARC 260''' | ### '''130.113.158.49 - MARC 260'''<br/>[[File:Printing - ETB-MARC pic4.png]] | ||
## click Continue | |||
## click Continue | |||
## Click Quick Install | ## Click Quick Install | ||
# Click Done<br/>[[File:Printing - ETB-MARC pic5.png]] | # Click Done<br/>[[File:Printing - ETB-MARC pic5.png]] | ||
# | |||
# | ==== Configure Authentication ==== | ||
# Select | |||
# Click on | ===== Windows 11 ===== | ||
# | |||
## | # Open the run Dialog with '''⊞ Win + R''' | ||
## | # Type in '''control printers''' | ||
# Select Printers & Scanners<br/>[[File:Printers & Scanners.png|Printers & Scanners]] | |||
# Select the printer that was just installed i.e. ETB 219 PS | |||
# Click on '''More Devices and Printers settings'''. This will open up a new window | |||
# Right Click on the printer that was just installed and select '''Xerox Printer Properties'''<br/>[[File:Xerox printer properties.png|Xerox printer properties]] | |||
# In the accounting tab, under: | |||
## ''Default User ID'' type in the authentication as required i.e. '''printer code or MacID''' | |||
## ''Default Account ID'' type in the corresponding password i.e. '''printer code or MacID password''' | |||
===== Windows 10 ===== | |||
# Open the run Dialog with '''⊞ Win + R''' | |||
# Type in '''control printers''' | |||
# Right Click on the printer that was just installed and select '''Xerox Printer Properties'''<br/>[[File:Xerox printer properties.png|Xerox printer properties]] | |||
# In the accounting tab, under: | |||
## ''Default User ID'' type in the authentication as required i.e. '''printer code or MacID''' | |||
## ''Default Account ID'' type in the corresponding password i.e. '''printer code or MacID password''' | |||
Revision as of 10:39, 9 September 2024
Download Drivers
- Download the Smart Start printer Driver for your system from either:
- Windows
- OSX
- Xerox Smart Start - Driver Installer
NOTE: use Mac OS Common Print Driver Installer
- Xerox Smart Start - Driver Installer
- Accept the UAC if required
- Agree to the Terms of Service
- Select the correct printer from the discovered printers by clicking quick install:
- If you don't see desired printer listed, you might need to connect to the VPN if you're on the WiFi
- Select "Don't your printer?"
- Enter the printer IP in the textbox as:
- click Continue
- Click Quick Install
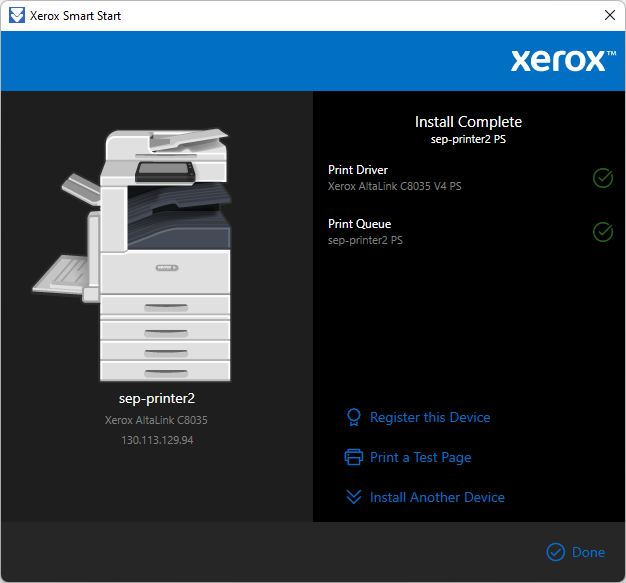
- Click Done
Configure Authentication
Windows 11
- Open the run Dialog with ⊞ Win + R
- Type in control printers
- Select Printers & Scanners

- Select the printer that was just installed i.e. ETB 219 PS
- Click on More Devices and Printers settings. This will open up a new window
- Right Click on the printer that was just installed and select Xerox Printer Properties

- In the accounting tab, under:
- Default User ID type in the authentication as required i.e. printer code or MacID
- Default Account ID type in the corresponding password i.e. printer code or MacID password
Windows 10
- Open the run Dialog with ⊞ Win + R
- Type in control printers
- Right Click on the printer that was just installed and select Xerox Printer Properties

- In the accounting tab, under:
- Default User ID type in the authentication as required i.e. printer code or MacID
- Default Account ID type in the corresponding password i.e. printer code or MacID password
